Installation Guide
A complete, beginner-friendly guide to setting up Ziexam AI on your server.
Video Tutorial
Watch the Full Installation Process
This video covers file uploading,and running the installer wizard step-by-step.
Installation Timeline
Uploading Files
First, we need to put the application files onto your server.
- Log in to your cPanel.
- Look for the "File Manager" icon and click it.
- Navigate to the
public_htmlfolder (or the subdomain folder where you want to install). - Click "Upload" in the top bar and select the
.zipfile you downloaded. - Once uploaded, right-click the zip file and select "Extract".

Creating the Database
The application needs a database to store users, exams, and questions. This is the most critical step. Please follow carefully.
Step A: Open MySQL Databases
In your cPanel dashboard, scroll down to the "Databases" section and click on MySQL Databases.

Step B: Create a New Database
Enter a name for your database (e.g., ziexam) in the text box and click the blue Create Database button.

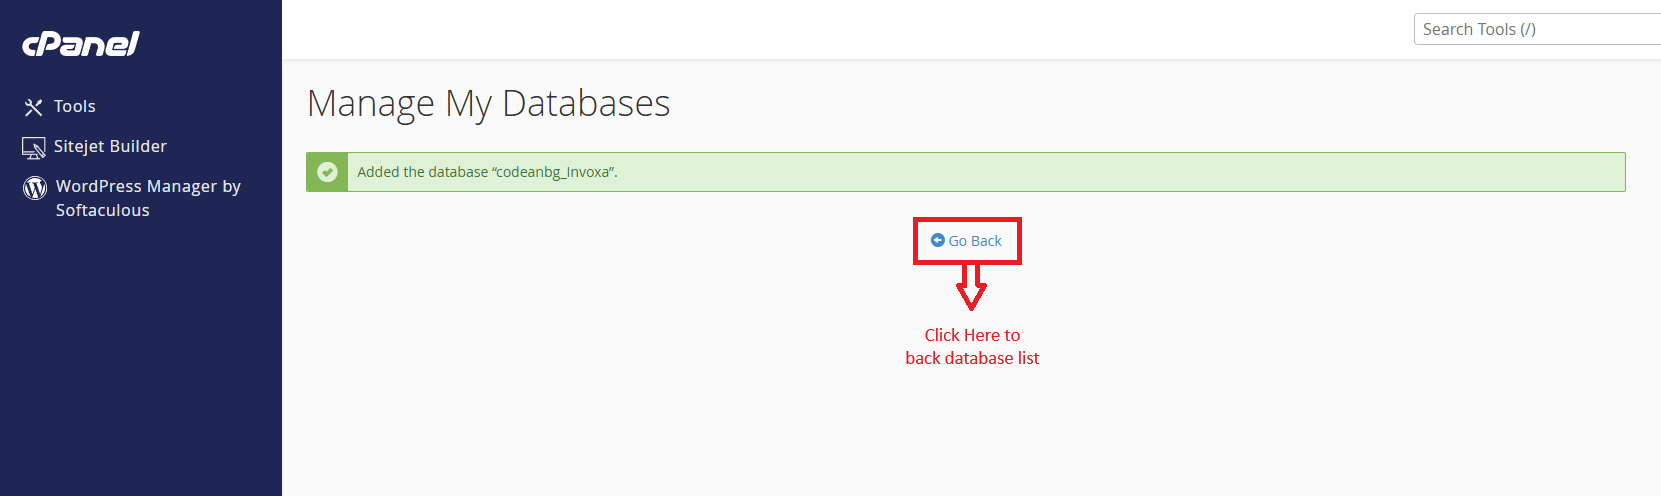
Step C: Go Back
You will see a green success message. Click the Go Back button to return to the main database page.
Step D: Create a Database User
Scroll down to the "MySQL Users" section. Create a username and a strong password. Write these down, you will need them later.

Step E: Go Back Again
After creating the user, click Go Back again.

Step F: Add User to Database
Scroll to "Add User to Database". Select the User you just created and the Database you created in Step B. Click Add.

Step G: Finalize Privileges
On the next screen, check the box for ALL PRIVILEGES and click "Make Changes". Your database is now ready.

Running the Setup Wizard
Now that files are uploaded and the database is ready, open your website URL in a browser (e.g., www.yourdomain.com). The Ziexam AI Wizard will start.
1. Welcome Screen
Click Start Setup to begin the automated installation process.

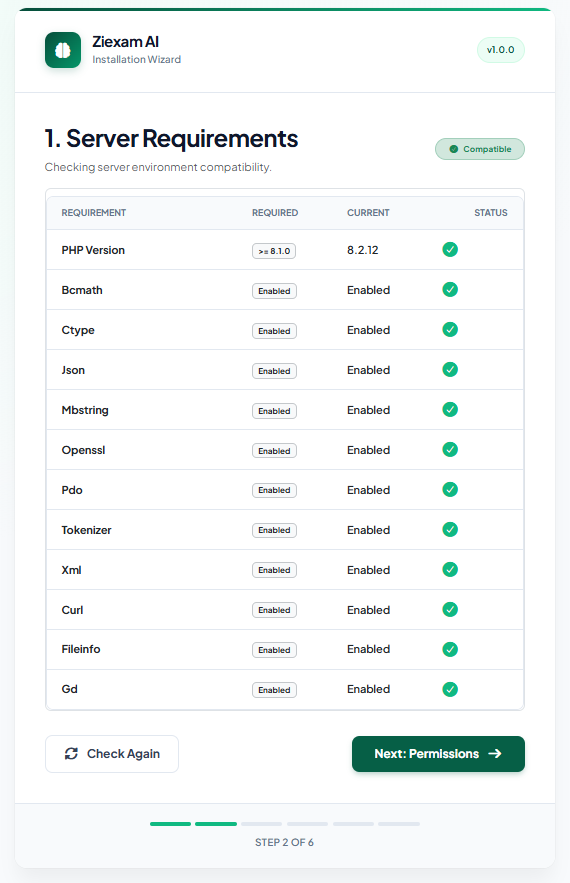
2. Server Requirements
The system will check if your server has the necessary PHP extensions. If everything is green, click Next.
3. Folder Permissions
The system checks if it can write to the storage folders. If you see red x's here, you need to change permissions to 775 in File Manager.

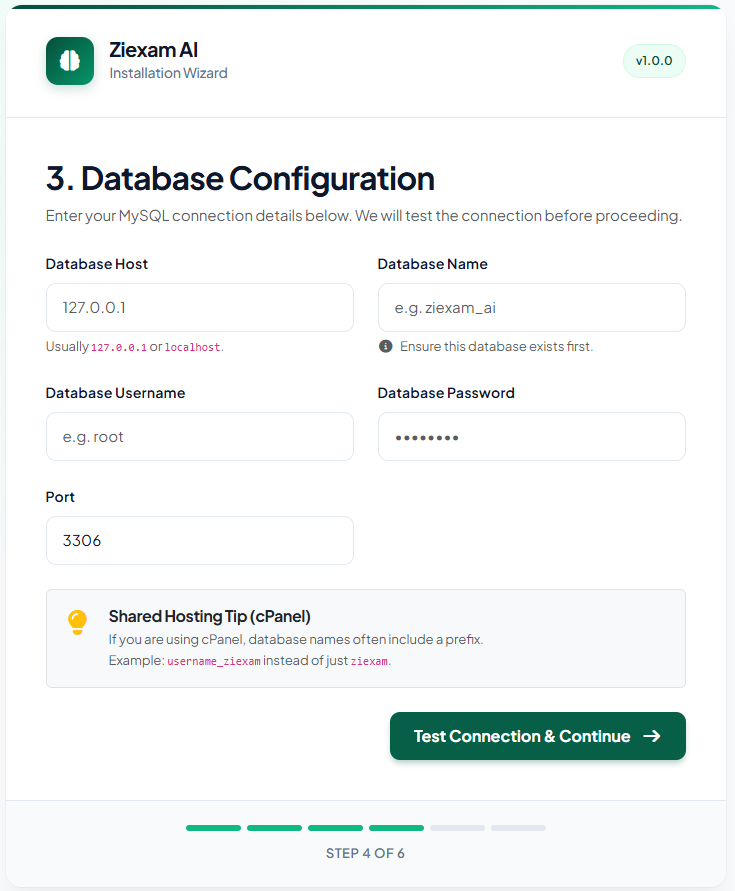
4. Database Configuration
Enter the details you created in Step 2.
Host: Usually 127.0.0.1 or localhost.
Database Name: The name from Step 2B.
Username/Password: The credentials from Step 2D.
5. Application & Admin Setup
Set your App Name and URL. Create your Super Admin account (this is how you will log in to the dashboard).

6. Installation Complete
Congratulations! The installation is finished. Click Go to Dashboard to log in.
